Apr 28, 2016

How To Turn Your Lawn Into A Garden

How To Turn Your Lawn Into A Garden | Organic, till-free, weed free garden creation

Our backyard was all "grass", but we wanted a garden. I say "grass" because our backyard was green, but there was very little actual grass. It was mostly weeds, but that will all turn into good organic material for our garden. We are taking a gardening class which has introduced us to garden placement and the power of mulch. The third class talked about growing your garden from seeds and when crops grow best in Pensacola.

Hubby and I are going to start with plants, rather than seeds, in our garden. I'm sure we'll tackle seed planting soon though. It is just easier to start with established plants and we don't have the supplies yet to grow from seeds. After a season or two growing from plants we'll have enough containers of the appropriate size to start growing seeds. Besides a local hardware store was giving seed packs away for free so I picked up packs of things I thought we would use...beans, squash, several types of lettuce, kale and spinach. My goal from this garden is to grow a salad after all!

The second half of the class was a discussion on what grows best when in our area. Each area of the United States has it's own climate and it's important to know what will grow best based on the season. The Gulf Coast experiences very hot and wet summers so typical 'summer' crops may be relegated to 'early' or 'late' summer and not during July and August. However more tropical crops may do just fine in July and August.

The start of our garden: cardboard. 
This site uses affiliate links. If you click on an Amazon link and make a purchase (disclosure), 
I may receive a commission which is used to help fund this blog. The price to you is unchanged. 


So this week we started making our garden! We laid out the cardboard for our garden and staking out what will be growing rows and what will be pathways. They recommended 4 foot beds and 3 foot pathways and a 3 foot perimeter. We made ours with a total of 4 growing rows to start. Our rows are a little bit longer than the recommended 15 feet, the longest is about 22 feet. However, due to some stumps in back, not all rows will be this long.

Some tips on laying down cardboard. It doesn't matter how big you think your boxes are, get bigger ones. I spent quite a bit of time laying down the remaining boxes we had from moving and it only made up about a quarter of our garden. Then we called local mattress and furniture stores to find some more. It was significantly faster, even with having to remove some staples. The tempurpedic boxes we found worked the best. The stores were more than happy to give us boxes so don't hesitate to ask.
Pin for later:
How To Turn Your Lawn Into A Garden | Organic, till-free, weed-free garden creation

For the mulch we decided to go with hay in the beds and wood chips for the pathways. We ran into a local tree trimmer who will deliver wood chips for free. Wood chips do not need to be replaced as often, but are not as much fun to walk on barefoot. I anticipate we'll be wearing shoes most of the time in the garden so I don't have to worry about that. Or we can cover the wood chips with pine straw if it becomes too much of an issue.

Learn more about mulch:


We got four bales of hay from a local feed store, but I'm anticipating we'll need some more before we are done. Once we get the wood chips we'll start laying they hay and chips down and I'll have a better idea about how far the hay will go. Remember we want to have a layer about six to eight inches thick of hay.  Once the mulches are down we will officially have a garden, we'll just need some plants for it!

How is your garden coming along?


Apr 25, 2016

Homemade Sauerkraut


I had been reading about all of the benefits of probiotics so I wanted to eat more fermented foods. One easy fermented food is sauerkraut. Sauerkraut is a traditionally German food and is essentially fermented cabbage. My favorite ways to eat it is on a Ruben sandwich or served alongside bratwurst.

I first went to Publix to see what sauerkraut options they had, but their sauerkraut is all in glass jars, which makes me nervous that they are no longer living and fermenting. Live sauerkraut will continually produce some carbon dioxide and if enclosed in a glass container the pressure may increase so it would explode. So the fact it packaged this way leads me to believe that it has been pasteurized.

Next I went to The Fresh Market where they have some that are in a plastic bag (I know…) with a vent and stored in the refrigerator. The vent allows any excess carbon dioxide that is produced to escape out of the bag and the refrigeration slows the bacteria down so it doesn't produce quite as much carbon dioxide.

I saw online how easy it was to make so I went to the store and purchased a large glass container, and a head of cabbage. First you remove the outer leaves of the cabbage and cut it up into sections.

Cabbage from the local farmer's market.

Then you want to either slice up the cabbage or shred it.  The first time we made sauerkraut hubby used a knife, but we used the mandolin this time and he said it was much easier (I LOVE my mandolin*).

Husband using the mandolin to slice the cabbage

 After shredding the cabbage you 'bruise' the cabbage. This helps break down the cellulose and helps it to release water. We used a a ladle, but later switched to a potato masher and I think it worked a little better.

Hubby 'bruising' the cabbage

Finally you want to add salt. The salt does two things. First it helps draw out the moisture from the cabbage to create the liquid the sauerkraut will ferment in. Then it also makes an environment that inhibits growth of other organisms. We ended up putting about a tablespoons in ours.

Add salt to the coleslaw 

Finally we placed one of the outer leaves of the cabbage to serve as a barrier between the kraut and the air. Ideally all the kraut will be in liquid brine and not exposed to air. The exposure to air can allow for the growth of unwanted bacteria and yeast. If after about 24 hours your cabbage does not release enough water to completely cover the kraut you will need to add some more brine (saltwater). Both times we've made sauerkraut we've had to do this. It may partially be because we are not bruising the cabbage enough, or not adding enough salt, or the cabbage was just a little dehydrated when we got it. It's nothing to stress about. The added brine should be roughly 1 t.ablespoon of salt per 2 cups of water.


To further compress the kraut down we put an old pickle jar filled with water on the cabbage leaf and then covered the whole thing with a paper towel. The goal is to prevent items from falling into the kraut and contaminating it while still allowing carbon dioxide to escape.


Within a day or so it will start to bubble and ferment. In about 2 weeks it started to taste like sauerkraut. After about a month or 6 weeks we moved it to the refrigerator.

The outer cabbage leaf barrier we used only lasted about a week. When it starts growing things you will need to replace with either another leaf or regularly compress the kraut to ensure it is under the liquid at all times. Again a potato masher can help.

We didn't add any spices, but you can. I just recently heard about a dill kraut and caraway is always a popular addition.

Other things we'd like to try and ferment are pickles and kimchee. Have you fermented anything?

Shared on Share The WealthHomesteader HopHomestead HopWaste Less WednesdayHome MattersPretty Pintastic,  Happy, Healthy, Green, and Natural 
*This post contains affiliate links. See disclosures.

Pin for later:
Homemade sauerkraut, an easily fermented food made from cabbage which is delicious.

Apr 21, 2016

Garden Class: Mulch Madness


Now I can't say I made up the Mulch Madness concept, but it perfectly describes our second gardening class by East Hill Edible Gardening. This was a hands-on class where they actually demonstrated their weed free, no till method.

First they have you lay a layer of cardboard down. You can lay it just over whatever ground is there. Any weeds or grass that is currently there will turn into 'organic matter' which is basically nutrition for your garden. Get regular corrugated cardboard that is thick and preferably without much ink or writing. Be sure to overlap any seams by about 6 inches so those pesky weeds can't grow through! To help minimize seams and save time get large boxes such as appliance or furniture boxes.

Then you add a thick layer of hay about 4 to 6 inches when compressed down. Make sure you get hay and not straw. Hay is fresh and green whereas straw is brown and dried. The store may want to point you in the direction of straw because hay has a bunch of seeds, but hay seeds don't have enough energy to sprout in your mulched garden. They can sprout in your grass, however so be sure you are careful upon transport! Straw, on the other hand, has fewer seeds, but they go crazy and your garden will look like grass rather than an garden.

Hay. Notice the greener color and smaller stalks. 

Straw. Notice the browner color and thicker woody stalks

To plant push the hay around to create a hole. Cut out the cardboard bottom and place about four heaping hand fulls of mushroom compost in the new hole. They sell mushroom compost at hardware stores, but it is not the same as getting it in bulk from a nursery.

Finally after you place your plant put a barrier around it to protect it from rolly polly bugs and other pests! You want to protect your plant until it is strong enough to ward off the insect so about when it has doubled in size.

After that you just make sure the garden has enough water and you pull any stray weeds that emerge.
There are a number of other things you can use for mulch particularly in pathways of your garden such as pine straw, wood chips, and leaves. We will be getting our garden set up soon and I'll be sure to take pictures of it!

Update: Don't forget to check out what we learned about garden placement from the first class and how we got started.


Affiliate link, see disclosures.
Pin for later:
Shared on You're The Star

Apr 18, 2016

Gardening class

My husband and I knew that we wanted to put a garden in our backyard from the moment we saw it, but neither of us have really had a garden. Both sets of parents have had successful gardens, but we’ve only ever had small herb gardens.
Thankfully when we went to the Pensacola Market we found out that East Hill Edible Gardening was having an organic no-till gardening class beginning shortly after we were to move into our house. It is a four week class that will cover a number of topics.

The first class covered why you should want to have a garden. One statistic he shared was that broccoli is best when consumed within 2 days of harvest. Then he described the process of it to get to the grocery store. A day for harvesting, a day for processing, a day to ship to the store, a day before being set out, a couple days on display in the store, and a couple of days in your refrigerator. It can be a week or more after harvesting before you eat it, no wonder they say frozen foods can be more nutritious than fresh!

Garden placement was a large part of the class. You want it to be a place you will see or be in often, not have standing water, and have full sunlight. They taught us how to see how much sunlight the area will have throughout the year and a neat trick on how to tell that the area has at least a half day of sun. Stand facing south, and then use your left arm to point to the location the sun will shine in that direction (likely the top of the tree or fence), do the same with your right arm. If the distance between your arms is at least 90 degrees, that spot will have half a day of sunlight. 90 degrees is the same as if one arm was straight up and the other was straight out.

They also recommended gardening straight in the ground and not in containers or raised beds. They showed us this picture of a carrot where the part you eat is only about six to 12 inches deep, but the root structure can be 5 feet wide and 6 feet deep. It's hard to get that in a container!

Finally they taught about the soil food web and all the beneficial bacteria, fungi and animals that live in the soil that help make your garden great. It was fascinating to learn that the plants will send out signals to recruit particular bacteria or fungi that will help produce the nutrients they need.

I highly recommend the class if you are in the Pensacola area.

What has been your favorite thing to grow in a garden?

Update: Check out the other things we learned about Mulch Madness and see Our Start.


Apr 14, 2016

HERMOSA study and Chemical Free Alternatives.


You may have heard of the HERMOSA study. It received quite a bit of press last month for measuring the amount of chemicals in teenage girls while using traditional products versus more natural products. HERMOSA stands for Health and Environmental Research on Makeup of Salinas Adolescents in Salinas, California.

They studied the urine of girls for metabolites of phthalates, parabens, triclosan and oxybenzone. Most dropped between 30% and 45% with just 3 days of avoidance.

Beauty Products by Spmath


Little of the press coverage about this study tells what they recommended the girls use. In general they were told to seek out agents that were labeled to be free of those four chemicals. However they also recommended some natural and homemade alternatives. 

If you have been following DIY beauty products at all you will likely be familiar. There are numerous blog posts and recipes for these products, but I wanted to show you examples of the types of ingredients.
  • Soft and silky hair: whole egg for normal hair, egg yolks alone for dry hair and egg whites alone for oily hair. 
  • Conditioning mask: banana, avocado and olive oil
  • Clarifier/conditioner: apple cider vinegar
  • Hair gel: gelatin
  • Hairspray: Lemons with water
  • Shampoo: olive oil, egg, lemon juice and apple cider vinegar
  • Conditioner: olive oil and egg
  • Lighten acne scars: lemon juice
  • Dewy glow: honey and aloe vera
  • Soothe redness and heal scars: oatmeal and honey
  • Pore strip: gelatin and milk
  • De-puff eyes: chamomile or green tea bags
  • Cellulite: coffee grounds, olive oil and sugar to help with cellulite
  • Strawberry body scrub: strawberries, brown sugar, olive oil, honey and lemon juice. 
  • Sugar waxing: sugar, lemon, honey
Lemon Thyme Cookies (1 of 8) by ImpromptuKitchen
It was interesting to see how large of a difference they were able to achieve after 3 days. It is encouraging to know that transitioning even for a short time will have a large impact. I may try some of the hair masks…what are you going to try?

Apr 11, 2016

What’s your favorite reusable bag?

There are so many types of reusable grocery bags. I started using them more once I found my favorite type. zero waste plastic free
This post contains affiliate links. When you make a purchase from the link I make a commission, but the price to you is unchanged. 

My introduction to reusable grocery bags were the big square bags that you can purchase from grocery stores like these adorable ones from Amazon. I collected gobs of them since they were so good for the environment (and usually free or very cheap). Well turns out having the reusable bag is a different story from using the reusable bag. Hubby and I would be halfway to the grocery store and one of us would ask, “Did you bring the bags?” Usually the answer was, “No…oh well.”

I thought moving the bags in my trunk would be the solution, and it helped, but I was still plagued by other problems. I would have to remember the bags were in the car before entering the store. Or I would have to run back out to the car. Then if they were used I’d have to remember to put them back in my car for next time. Also my husband drove most of the time and we never would remember to put bags in his car. So while it did help, they mostly just stayed in the trunk. I've since learned the trick of putting them by the door so you see them when you head back out to the car.

Example of the big square bags. Foldablebags.com 

Then for Christmas one year I got a small reusable bag as a stocking stuffer similar to these* or these*. I thought it was a great idea, it folded up into this little 2 inch cube. I could carry it in my purse! Unfortunately it had to be folded up in a very exact way, and very tightly, otherwise it wouldn’t snap close and you’d just have a loose bag to deal with.

Have you ever tried rolling up a sleeping bag only to have it not fit back in its pouch, so you have to keep re-rolling it tighter and tighter until it finally fits? It’s annoying, and dealing with that bag was the same thing. I must not be the only one with that problem, because the examples I show above seem to be designed better, thank goodness.

I was also in a different phase of life, so while I may have carried it around and had it physically in my presence more I still didn’t use it much. I’d like to think that if I were to receive one now I’d use it a lot, but the hassle with putting it back I doubt it would be a go-to.

When I moved to Hawaii I was given a free reusable bag for signing a petition to refuse plastic bags. This bag was revolutionary to me. It was a soft sided bag that came with its own pouch! Rather than having to roll or fold the bag to make sure it fit, I could just cram it in the bag and it had extra room to spare. This made storage a little bigger, but it was still only about the size of a sunglasses case so it easily fit in my purse. Also the pouch was attached to the bag. You didn’t have to worry about losing it.

skipthebag.blogspot.com
My free bag from Plastic Free Hawaii. See how it fits nicely into a small bag!

Having a plastic bag in my purse at all times meant that I didn’t have to pre-plan trips or run out to the car to get bags. When we would be halfway somewhere I could finally answer, “Yes, I have bags in my purse!” It was also water resistant and washable so if something spilled I could either wipe it up or throw it in the washing machine (I think you were technically supposed to only hand wash it, but it was fine in the washing machine the few times I washed it). That bag lasted me about two years before some of the stitching in the handles started coming apart.

In the meantime I had bought a bag from EnvBags. They were very similar to my favorite bags with a few differences. What first drew them to me, was their fun prints! No longer did I need to have a boring light blue bag with a logo on it, I could have one with fun fish*! Next, the bag is sturdier than ones I've had before. It is still a soft sided bag, but it has a little more heft to it. Finally it has a gusset (whatever the heck that is), but it means it has a flat bottom which helps it carry more things. Gone are the days where I would get 5 bags for 7 items…it all fits in this bag. They say it can hold up to 40 lbs. and I am surprised by how much it can carry. To store it has a similar fold and snap closure like the bag from before, but the bag nearly folds itself and the snap straps are very generous. I sometimes even roll it too tight!

skipthebag.blogspot.com
Rolled EnvBag

For me the biggest downside is the bag comes with a pouch. However the pouch is detachable from the bag. You can attach them, but I’m lazy and never would. So for me the pouch became waste, although one could easily repurpose it.

skipthebag.blogspot.com
The EnvBag bags in use
Now technically these bags are still plastic since they are made of nylon. A better alternative would be to use a cloth bag such as these* I love that they roll up too! However in my attempts to conserve plastic I won't be on the hunt to replace these bags until they no longer work. EnV Bags will provide you a way to recycle their bags if you contact them, which is very nice of them to offer.

So what was your reusable bag journey? Do you have a favorite bag to use when you #skipthebag?

Love using your bags? Check out the #SkipTheBag Challenge.


*This post contains affiliate links, not a sponsored post. See my disclosures.

Apr 7, 2016

Chickens!

Chickens!

For some reason my husband and I got it in our heads that we might want to raise chickens. I’m sure it was just a perfect storm of events. One of our good friends in Hawaii had chickens, we got a house with a large yard in Pensacola, we went to the East Hill Edible Gardening class on chickens. And about a week later we had chicks!

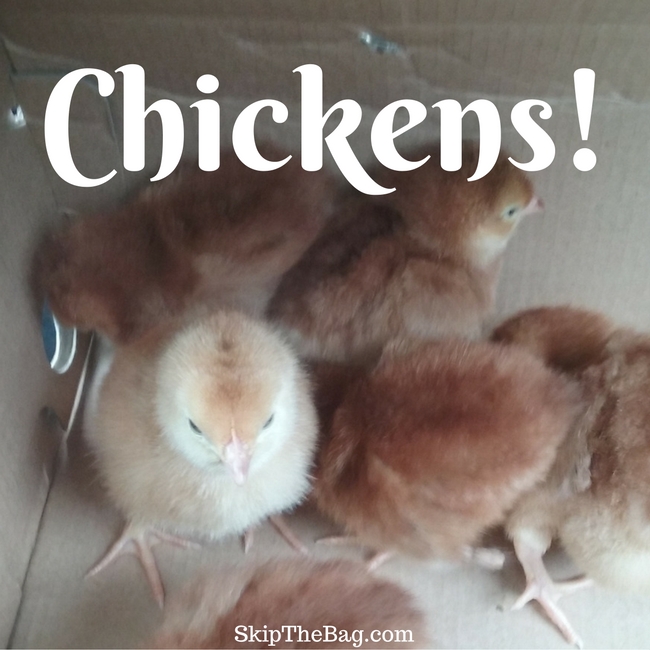
Chickens! Our 6 Rhode Island Reds
They say chickens are easy to take care of, more work than a cat, but less than a dog. You have to check in on them daily to ensure they have enough food and water and collect eggs, but you don’t have to walk them!

We plan to keep our chickens in a coop full time. Free ranging is allowed where we live, but there are hawks (or ospreys), and pets abound. Besides, we don’t want to be tied to put the chickens away every night. So we decided to make our coop large enough that they have all the room they need to live a happy and healthy life within the coop.

We went to a chicken class where we learned where to purchase chicks, what sort of environment they need, what sort of feed. We went to the feed store and got 6 Rhode Island Red chicks, a bag of chick starter, and a piece of hardware cloth. We already had a large cardboard box, a shop light with incandescent bulb, a feed and water dish and leaves. Mix that all together and you get a chick coop safe enough that the dog and can’t enter! Our cat couldn’t care less, but our dog is very fascinated.

So far they have been very easy. Both my husband and I go out there two to three times a day to make sure they are doing alright and are used to us and being held. The chicks need to be kept with a warm light until all of their feathers come in. We’re keeping them at about 95 degrees now and decrease by 5 degrees a week until they are at room temperature. They’re already getting more feathers.

Our set up. Feed and water containers, leaves, a lamp, a perch and of course, chicks.

Our chicks
They say it will take about 6 months until we get eggs, so we are saving up all of our egg cartons, but when it happens we'll be up to our eyeballs in eggs!

Have you ever wanted chickens?


Affilitate Link, see disclosure
Pin for later:


Apr 4, 2016

Levels Two and Three of #SkipTheBag

reusable bag plastic free

It's so exciting to see how many people have participated in the #skipthebag challenge. Keep up the great work by refusing plastic bags! I've had many people say that they already routinely use reusable bags while shopping. So I'd like to extend level two and level three challenges to them.

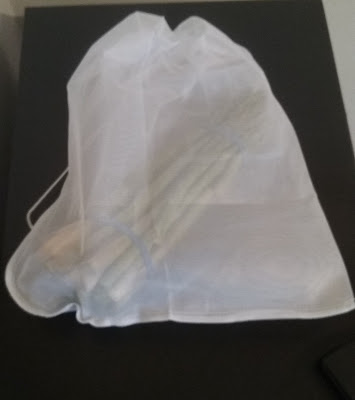
Produce bag #skipthebag

I use affiliate links to support the blog. If you use a link and make a 
purchase I may get a commission, but the price to you remains unchanged.

Level two #skipthebag is using reusable produce bags. I recently purchased some produce bags and I love them! Mine fold in quarters and have a draw sting bag closure. I consider it a more advanced level because it would be silly to use reusable produce bags and then put them in a plastic bag. Especially if you are purchasing a lot of fresh fruit and vegetables, using reusable produce bags can save a lot of plastic!

Level 3 of #skipthebag is using reusable bags or glass containers to buy bulk food. This is one I'm still working on. I've got a fair collection of glass bottles, but I do not have any reusable bags. I love that this one has a zipper, but I also love that this bag spells out what it is for and has great reviews.

Unfortunately part of the reason why I tried to reach for level three is that I haven't found many stores that sell bulk food. Or at least ones that sell bulk food that we actually want. Most stores I've found that sell any bulk food, sell candy or nuts or other treats that we just don't eat. I'd love to find baking ingredients, lentils and spices! I haven't given up though, there are still some specialty and 'ethnic' food stores I need to check out.

Which level of the #skipthebag challenge are you on?

Pin for later:
Reaching higher levels of refusing single use plastic bags.