Aug 31, 2016

What is a Blog Hop?

Since starting the Waste Less Wednesday Blog Hop I've been getting questions about what a blog hop is and how to participate. So here are answers to those FAQ.

What is a blog hop? 

Blog hops, also known as link parties, are a way to find blog posts related to a theme. For Waste Less Wednesday theme is pretty broad: zero waste, living plastic free, sustainability, less waste recipes, homesteading, upcycling or basically anything having to do with helping out the environment. There are others with themes on homesteading, finance, or even with no limits at all.


I am a blogger, how do I participate?

Great! I love having new participants and discovering new blogs! Go to the most recent Waste Less Wednesday blog hop. At the bottom of the post it will say Link up Below and then you will see thumbnails of posts already submitted. Below that on the left hand side you will see a blue button that says "Add your link." 

Clicking on the button will take you to the InLinkz website. From there copy the URL of your specific blog post not your homepage into the spot for URL. Check the title, put your email address, and add a photo. Click the "Done" button and it should be added to the link up. 

From there please add a link back to the Waste Less Wednesday hop. To do this I copy the blog hop link, edit my post saying "Shared on Waste Less Wednesday" with a link the the hop. Conversely you could post the Waste Less Wednesday button on your blog post. 

Finally, don't forget to visit the sites of your fellow bloggers. Clicking on the thumbnails will open up a new window with the post. Each week I feature the person who has been the most social. To earn this you must leave comments and/or share posts using the hasthag #wastelesswednesday. 

Why should I participate?

It's a great way to get your blog posts in front of a new audience! People visiting this blog hop all have an interest in the environment. Writing the blog post is the hard part. Posting it on the link up is a way get it out in front of people who want to read your kind of posts.


I don't have a blog, how do I participate?

If you are a reader, and not a blogger, you can simply click on the thumbnails of articles that interest you. Clicking on the thumbnails will open up a new window with the post. Feel free to explore all of the links. You may find new blogs you want to follow.


Aug 29, 2016

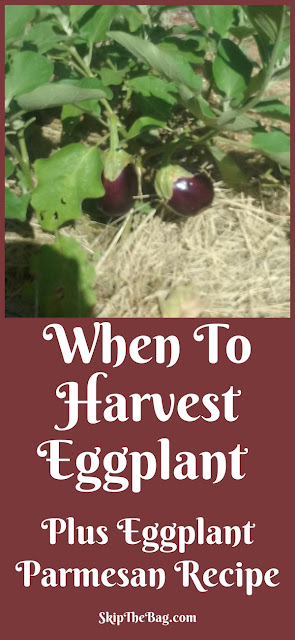
When to Harvest Eggplant + Eggplant Parmesan Recipe

Tips for harvesting eggplants and a delicious recipe for Eggplant Parmesan.

When you first grow a garden there are many lessons that you learn. We already had to deal with a caterpillar and stink bug infestations and garden placement. I wouldn't have thought we'd have so many questions about when to harvest our plants.

We had some eggplant that we harvested earlier and it was delicious. Hubby made eggplant Parmesan with it and it was the best that we have ever made. So we were really excited for more eggplant.

At some point we had two of them that turned an orange color. We weren't sure what that meant. We kept wondering if it would turn back purple or what was going on. Well apparently eggplant turns orange once it is overripe and unfortunately tastes bitter.

harvest eggplant
Orange Eggplant- Overripe and Bitter
This site uses affiliate links. If you click on a link and make a purchase I 
may receive a commission, but the price to your remains unchanged. 

We learned that you cannot pick eggplant too early. When it is a good size and the skin is still shiny purple it is good to eat. If it starts getting dull, pick it quick. If it turns orange, you might as well pull it and start over.

Even though we lost those two, we thankfully had 3 others which we were able to pick and eat! Here is the recipe that Hubby uses to make his Eggplant Parmesan.

Pin for later:
Tips for harvesting eggplants and a delicious recipe for Eggplant Parmesan.


Hubby's Eggplant Parmesan Recipe

Eggplant, sliced
1 egg
1 cup breadcrumbs
salt, to taste
1/4 cup Parmesan cheese
olive oil, enough to coat the bottom of the pan to fry

Heat olive oil in pan
Slice the eggplant into 1/4 inch thick rounds
Mix the bread crumbs, salt and Parmesan together.
Coat the eggplant in egg and then the breadcrumb mixture
Fry in heated olive oil

Serve with pasta and marinara sauce.

Looking for another way to use eggplant? 
Try roasted red pepper baba ganoush! It is a delicious dip, which can be used similarly to hummus.


Or would you rather kick things up a bit and try some pickled jalapenos?


Shared on Home MattersWaste Less Wednesday,  Healthy, Happy, Green, Natural

Aug 28, 2016

SkipTheBag is now SkipTheBag.com!

That's right folks, SkipTheBag is moving onward and upward. I've been using blogger for the past 5 months, but it's time to have my own domain name.

What this means for readers? 

Nothing! If you enter from a blogspot link you should automatically be directed to the skipthebag.com site. It is possible you may see some redirect errors or some things not looking just quite right, but those should be limited and corrected shortly. Feel free to bookmark or save skipthebag.com so you can come directly to the site for updates.

What it means for me? 

Every picture and every place that has the blogspot name will have to be updated. I will slowly be working on updating that. So please forgive me if you see some pictures on posts that still have the blogpost watermark!

Finally, thank you so much for reading!!  I wouldn't have made the plunge to be a 'real' site if you hadn't been following. So thank you for reading, commenting, linking up and otherwise supporting the blog and my mission to reduce plastic bag use, have a garden and live sustainably with little waste.

Aug 25, 2016

We Have Eggs!


Shortly before Easter Hubby and I took the plunge and got chickens. You can read about when we first got them, the coop we built, and how easy they are to keep. 

Chickens start producing eggs at about 20 weeks so the first week of August our egg watch began. Every day we would go out at least once a day, if not twice just to see if there were any eggs. We could tell they were close because they were now full grown and were clucking and squawking like they wanted to lay eggs, but they just weren't doing it. 

Well last Wednesday I was off work and walked out to the coop about noon to check on them and give them a treat. They usually all run toward the door when they see Hubby or I come outside because they either want let out of the coop or to eat the treats we bring them. Well rather than getting up right away one of them was laying down near the water. When I walked in I saw she was laying on an egg! I was so thrilled! 

Of course Hubby and I both wanted to have it, but we decided that we would wait until there were at least two eggs and we would eat them together. It was fair, but that also meant we would have to wait until the weekend. The next day Hubby was going to work late so he was the one to check on the coop, but they didn't lay. It wasn't until Saturday that they laid again. Hubby went out mid afternoon and there were two eggs! One was even in the nesting box! 

We are using two five gallon buckets as our nesting boxes. They are propped up off the ground and have a small ledge. When the chicks were little they would all sleep in one of them. We were afraid they wouldn't roost so we took the boxes out for nearly 2 months. Now we were afraid that they wouldn't fit in the buckets and/or that they wouldn't know to use them. But apparently our fears were a little unfounded because at least one of them has figured it out!

Sunday morning when I let the chickens out I found another egg. So for breakfast Sunday morning we each were able to split the four eggs. My father-in-law joked that we only need 696 more eggs to recoup our investment!

chickens backyard chickens

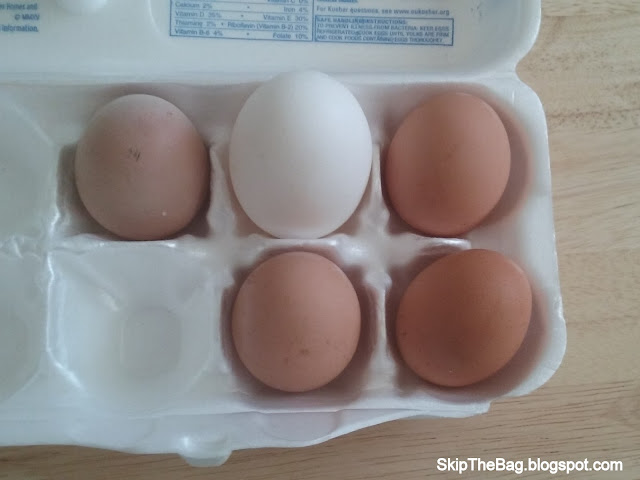
The eggs are brown and pretty small. They are shown here with an extra large egg that we had from when we were still purchasing them. It's slightly hard to tell from the photo, but they are significantly smaller I'm guessing the egg is more along the size of a medium egg. I'm not sure if the eggs will get bigger or if this is just the size they will be. Hubby said the shells are much thicker than traditional eggs. I'm guessing part of that is due to the fact these are their first eggs, but also because they aren't cranked up to produce as many eggs as a production chicken. 

backyard chickens chicken egg

Do you have chickens? What was it like when you got your first egg?


Shared at Waste Less WednesdayHomesteader HopHome Matters

Aug 22, 2016

DIY Upcycled Washer Necklaces


I feel like I never have enough of the 'right' necklaces. It either sits in the wrong spot, or is the wrong color. So I decided to make my own. Via Pinterest, I found a very intriguing idea from Scarletrevolution's Etsy: Washer necklaces. While I could have purchased her washer necklaces, I figured I could make some of my own. I would get washers, cover them with scrapbook paper using mod podge.

Any variety of washers can be used. So far I've only made the ones shown above. However I recently went to Lowe's and bought all of the ones shown below which have a variety of sizes, widths, and weight. It would be very easy to upcycle some old washers if you've got some hiding in the garage.


However if I have two contrasting colors or complementary colors hanging them like this would be fun!


These are incredibly easy to make. I simply found a washer and some scrapbook paper that I like. The site which inspired me used comics, so you can probably use any paper with a design or picture you like. I traced and cut the shape out of the paper and used mod podge to attach the paper to the washer. I had the matte mod podge, but I think a glossy one would be better and make them look better. Another option would be us use an enamel coating. The chain is one I took off an old necklace I had.

Right now the back of the necklace is still unfinished. Unfortunately the necklace likes to flip around some while wearing it so I would recommend covering the front and back.


So with a few minutes of time you can have the perfect necklace for any occasion!

Looking for more upcycles? Check out the headboard we made from an old door!


Pin for later:
DIY Upcycled Washer Necklaces

Shared on Waste Less Wednesdays

Aug 18, 2016

Cheesy Quinoa Bake

Delicious quinoa, cheese and vegetable bake.

I've been making my way through some recipes I've found on Pinterest. I was attracted to this one called 'Cheesy Quinoa Mac and Cheese' because who doesn't love macaroni and cheese? And quinoa in anything makes it healthy, right? ;)

The original recipe had some comments saying it wasn't quite as cheesy or creamy as traditional macaroni and cheese, so a more appropriate name is Cheesy Baked Quinoa. Regardless of what it is called, it tastes good. As an added bonus the recipe is flexible so you can use up whatever vegetables you have on hand. Ingredient links are affiliate links.

Ingredients:

1 1/2 cup quinoa, cooked according to package directions
2 cups sauteed vegetables (we used broccoli)
2 cloves minced garlic
2 large eggs
1 pinch of salt
1 cup of milk
2 cups grated cheddar cheese (reserve 1/2 cup for top)
1/2 cup Parmesan cheese
Panko or regular bread crumbs for topping
Any other ingredients you think would be tasty or need to be used!

Directions:

1. Preheat oven to 350 degrees.
2. Sautee any vegetables you would like to use.
3. Mix eggs, milk, garlic, and salt in large bowl.
4. Fold in quinoa and vegetables and any other additives.
5. Place in greased 9" x13" pan. Top with remaining cheddar cheese and bread crumbs.
6. Cook until top is golden brown and cheese has melted, approximately 3 minutes.
7. Enjoy!

When we made it we only used 1 cup of frozen broccoli that we sauteed with seasoning salt. I wish we had added more so I increased it in the recipe above. Some other options for vegetables to use are bell pepper, spinach, zucchini, really anything!

Others really liked the 'crunch' of the panko bread crumbs, but I couldn't really notice them so I would be very liberal with it. I had only lightly covered the top of the dish with panko. Finally, we also had some tricolor couscous to use up so we replaced 1/2 cup of quinoa with the couscous. This doesn't change the flavor it was just something that I had to use up.

This was pretty good and I would make it again. Looking for another delicious recipe? Check out Hubby's Famous Fish Tacos.

Pin for later:
Shared on Waste Less WednesdaysHome Matters

Aug 15, 2016

Garden Infestation


Our newly planted cucumber plants kept looking worse and worse. I figured something was eating them, but couldn't figure out what the culprit was. Then one morning I went outside and saw this:

caterpillar poop
Caterpillar Poop

I had no clue what it was, but I was pretty sure it was related to whatever was eating my plants. I was thinking it was eggs of the offending bugs. I snapped a few pictures and posted it to a local organic gardening group to see what it could be and then scoured Google Images. We have been dealing with leaf footed stink bugs (what I did with them), and it looked a little similar to their eggs.  So I was afraid in a few days our whole garden would be covered in stink bugs.

Thankfully someone from the organic gardening group got back to me quickly and said they thought it was caterpillar poop. Caterpillar poop?!? I was relieved. I could deal with caterpillars. I would just pluck them off and feed them to the chickens. There would only be a few of them to deal with unlike the hundreds of stink bugs I had fears of. I wasn't sure I completely believed her though. I mean, do caterpillars actually poop? I've never seen caterpillar poop before and these green spherical things sort of look like eggs.

So I went out in search of the caterpillars that I was hoping it would be. I walk out to an area where there were some of the green spheres and looked at the back of the leaf and didn't see anything. Then I figured if it was feces it may have dropped from above so I flip over the leaf above it and BINGO! I found a caterpillar. Phew! It was caterpillar poop! I thanked the woman profusely for helping me out. I grabbed some tongs and a bowl of water and pulled those two caterpillars off the vine.

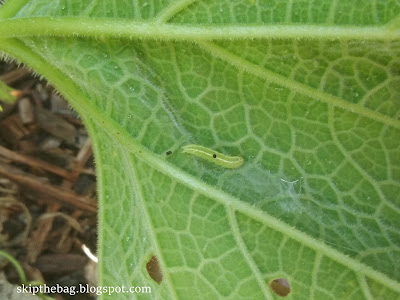
Caterpillar
Caterpillar Infestation

Then I moved to another area where I had seen some of the green spheres. There was another caterpillar and some smaller ones. I pulled those off and put them in bowl. I decided to check the leaf next to it and discovered even more caterpillars of varying size. I quickly realized that I didn't need to worry about stink bugs taking over, because the caterpillars already had!

Nearly every leaf had a caterpillar in some stage of development. Some were itty bitty, smaller than a nail clipping. Some were an inch long and a centimeter wide. Others were already in their cocoons. I went leaf by leaf trying to get each one I could find and dunk it in the water. Then when I was done I fed them to the chickens. I'll admit I mostly only got them in the area where the new cucumbers were planted. There are some on a squash plant we have, but since the squash isn't producing I decided to leave them for now. I know that's a big mistake, because it will only mean more to pick off later, but it's so hot!

I also learned about Bacillus thuregensis (Bt). Bt is a bacteria which is naturally occurring in the gut of caterpillars. The bacteria produces an endotoxin that leads to death. can be used to which is a toxin which should work on all soft-bodied insects. You have to apply it late in the day because sun degrades it and it is washed away by rain. We are considering adding it to our garden, but wouldn't you know we are expecting heavy rainfall for at least a week!

At this point it is a decision between pulling out the squash, which isn't really producing, and pulling out the cucumber since they have the brunt of the cucumber or applying Bt and try to salvage the cucumber.

Have you ever had to pull a plant due to an infestation?

Affiliate link, see privacy and disclosures


Shared at  Waste Less WednesdayHomesteader Hop,  Home Matters

Aug 11, 2016

Serving Tray: Upcycled Picture Frame


It was my mom's birthday and I was a little stumped about what to get her. Then I remembered seeing how some people upcycled old picture frames into serving trays. My mom loves having people over and brightly colored decorations in her house. She has brightly colored dishes and shares my addiction to colorful napkins. I remembered seeing that people had used old picture frames to create serving trays and thought that would be perfect for her. So I went on a hunt to gather the supplies for a serving tray.


To make a serving tray the first thing you need is a sturdy picture frame, preferably wooden. Now you would think it would be easy to find a picture frame suitable for this purpose. And while there are tons of picture frames there are not as many which are a suitable size for a serving tray and those that are are not generally wooden.


I used this task as an excuse to explore some of the local thrift stores. (For some reason Pensacola has a TON of thrift stores, but unfortunately many of them just don't carry that great of things.). The first place I went to had some good options, that were just sitting out in front of the store. When I went in to inquire about them I discovered that the woman running the store had set them aside for herself and the place wasn't really a thrift store, but rather a thrift store sorting facility. Strike one. Then I went to two other stores also striking out before finding this frame. It was perfect. It was the correct size for a tray, it had a wooden frame, it had a wide enough frame to add handles and it was already white! Perfect with a bonus.

Now that I had the frame I had to find some handles. This, too, was more challenging than I had anticipated. Big box hardware stores have nearly an aisle dedicated to different handle options, there aren't very many that are pretty enough to be tray handles. I really wanted one that had glass on it, but neither of the places I went had them. I ended up going with a nickel plated cage handle that worked well enough. I marked holes on the frame using the handles as a guide and then used a drill for the holes. The holes on  one side weren't quite lined up, but the handle was forgiving and it still screwed in. Afterward, I realized that the screw heads were rounded so it made the tray not quite lay flat on the table. It also meant that there was a possibility for the screw to scratch the table. So I bought some felt stickers and placed them in the corners. They raised up the tray enough that there was no risk of the screws scratching the table.


Finally, I had to select the paper to go in the tray. The tray was shaped differently than the 12x12 paper I had selected. Since it was striped I had some added difficulty trying to make sure the paper lined up properly. However I was able to find some paper that complemented some of my fun napkins and would match my mom's dishes. If this were my tray I'd probably change out the paper for different seasons, but knowing my mom she'll probably just leave it these bright summery colors. I'm so pleased with how it turned out that I'm temped to make one for myself!


Looking for another upcycle? Check out these washer necklaces


Pin for later:

Aug 8, 2016

Homemade Toothpaste Fail

My attempt at making toothpaste did not go well.

After buying bamboo toothbrushes I was motivated to try and go a step further by making my own toothpaste. It probably seems a little out there for a normal person, but I kept seeing person after person making their own toothpaste or tooth powder. Seeing everyone else do it further motivated me to give it a try.

Now there are several different recipes out there with different ingredients. Some use xylitol or stevia. Others use bentonite clay or glycerine. I decided to start out with the simplest one I could find and one that I had all the ingredients on hand.

Homemade Toothpaste Recipe

2 T baking soda
2 T coconut oil
10 ish drops of Mint Extract *Other recipes use peppermint essential oil, but I was using what I had.


Mix them all together and you are ready to go. If you don't live in a hot humid place like me, your coconut oil may be solid. Warm it up in a water bath to make it a liquid. I can't comment on the consistency after it is mixed together because almost the only time I have seen coconut oil as a solid was when I was visiting home in Oregon and I saw it in my bag and it took me a minute to realize what it was. Between living in Florida and Hawaii the past 5 years temps rarely get down below coconut oil's melting temp. I'm guessing it truly is more of a paste.

You then wet your toothbrush dunk it in the toothpaste (most people probably scoop cause it's more solid) and brush as normal.

Pin for later:
My attempt to make own toothpaste did not turn out well.

Except it tastes awful. Hubby has done it twice. The first time it wasn't mixed up very much so he basically was brushing with coconut oil and said, "this isn't so bad." The second time he got it with baking soda and he asked, "Why are we doing this?" and exclaimed "I don't like the earth this much!" To say he isn't a fan is probably a bit of an understatement.

I have been forcing myself using it for the better part of a week and I'll admit I'm not much of a fan either. It just tastes so salty even trying to avoid my tongue. I have found more tolerable using less of it. So be sure to only get a little bit on your brush. Also rinse your mouth very well afterward (I probably don't have to remind you of this) and know it won't leave your mouth with a minty fresh taste. My teeth do feel clean afterward; it does a good job of scrubbing them clean, but the taste is taking some getting used to.

Update: Here is a collection of the best homemade toothpaste recipes!


So I will be testing out some zero waste toothpaste alternatives in the future, especially if I want Hubby to get on board! Have you had a positive experience using homemade or zero waste toothpaste?


Aug 4, 2016

6 Zero Waste Shampoo Methods

no poo alternatives

While analyzing my waste production I saw that Hubby had me beat in the bathroom. One area that I thought I could quickly improve was with shampoo. I have tried a variety of alternative hair care methods in the past, and I can't honestly say why I did it. I wasn't really into zero waste or plastic free at the time, but I am an Oregon girl environmentalist at heart so maybe that was why. Here are some zero waste shampoo options and my experiences with them. Some of the links may be affiliate links.

For background my hair is naturally straight and uncolored. It is dry and tends toward breakage. It doesn't really tangle and I don't typically use any products in my hair. Although a stylist friend introduced me to CHI Total Protect which is AMAZING and I am considering buying it even though it is packaged in non-recyclable plastic! It's that good.

No Shampoo

This is as it sounds, you do not use shampoo or cleaning products of any kind. The thought is that you go without destroying the oils your body naturally creates and the production eventually evens out creating lovely, moisturized locks. There is a greasy period of time when the oils are figuring out how much to make and every time you cleanse your hair you are disrupting the natural oil production so you extend that greasy period. Using a boar hair brush or bamboo you can spread the oils along the hair and make it seem less greasy. Well it seemed like I always needed to look presentable so I would wash my hair and thus never got to the non-greasy part of no shampoo. I have tried to extend the number of days between washes though. And I've realized that when my (naturally dry) hair looks slightly greasy it is what most people consider shiny, and I should embrace it. 

Conditioner Only

This is a cousin to no shampoo and I've seen it primarily recommended for curly hair. It is where you do not use shampoo products, but only conditioner. Apparently it helps keep the curls as curls and not frizz. I've even read that most conditioners have enough detergent action that they will clean your hair. I have probably had days where I only conditioned my hair, but not enough to comment on it. And my hair is straight I can't comment on its ability to keep curls looking good. 

No 'poo

Now you might think that going without any shampoo would be considered no 'poo, but the majority of time it is referring to washing your hair with baking soda and rinsing with apple cider vinegar (ACV). There are a myriad of recipes out there using different ratios of baking soda, ACV and water. Some have you apply dry baking soda to your head, others have you dilute it with water. I found that the best ratio for me was using a relatively small amount of baking soda mixed with water. I would add 1 teaspoon of baking soda to 1 cup of water. I had an old crystal light container that I had marked the level of 1 cup on the side and kept in the shower. Prior to the shower I would add 1 teaspoon to the container and I would fill it up during my shower. I would then pour most of it onto my scalp and massage into my hair. You massage it for a little bit and your hair will feel slick, there is no lather. Then you rinse out the baking soda and rinse with ACV.  I would mix 1 T in 1 cup of water. I would not skip the ACV step, my hair was pretty dry afterward. And don't worry, you don't smell like vinegar even if you don't rinse it out. Once the hair is dry the scent is gone. The ACV is acidic and is supposed to close the cuticle and make it less frizzy. I did this for a while until we moved to Hawaii. I'm not really sure why I stopped other than it just became easier to switch back to conventional shampoo. I've heard this is kind of hard on your hair, and it may be, but for the several months I did it I didn't notice too much. 

Shampoo Bar

This has been the easiest transition. I purchased a variety pack a couple of months ago. The bar will lather up when you use it. You can either rub it between your hands and then massage your scalp or you can rub the bar directly on your scalp. There are several different kinds of shampoo bar that tout different products so you may need to experiment until you find one you like. It is also possible to make your own, but I haven't ventured into that just yet. I have heard there are conditioner bars, but I haven't tried them yet.  Update: Read my review of shampoo bars and when I got a conditioner bar.

Coconut Oil

This is used as a conditioner or hair mask. It is thought that the protein in coconut oil is small enough to penetrate the hair cuticle and moisturize and strengthen the hair. I have not been very successful with it. A little goes a long way and many people suggest just applying it to the ends of your hair. You can apply it to the entirety of your hair it just may get greasy. That oiliness is why some recommend washing your hair, sometimes even twice, after using it. However other people love it and say their hair is great. I've not had overwhelming success with it, but I don't not like it. 

Cornstarch

I use cornstarch as a dry shampoo. The simplest form of DIY dry shampoo-- only one ingredient! I just apply the cornstarch to my roots with a makeup brush, let it absorb the oils and then brush it through my hair. It makes my hair a little light while applying, but once it brushes out it isn't noticeable. I do have light brown hair though. Cocoa powder (unsweetended, of course) also works for dark hair, but I haven't used it alone, only with cornstarch. Using the cornstarch usually allows me another day without washing my hair. 

So there are some alternatives to buying shampoo in a plastic bottle. Although if you choose to buy shampoo in a plastic bottle, remember to recycle it!

Update: Hey guys I just wanted to add some options I just recently found out about. I loved the concepts so much that I became an affiliates for the company. So if you decide to purchase something I'll get a small commission, but your price is the same either way.

Plaine Products

Plaine Products is a company that sells shampoo, conditioner and body wash in aluminum containers. You purchase them from the company, use their great smelling products, then return the empties back to the company for them to REUSE! Yes, they will refill the bottles (after cleaning, of course) and send them on their way to another customer. If the bottle isn't in shape to be reused, they will recycle it and turn it back into a bottle. The best part? They pay for return shipping! Oh yeah, their products are also vegan, color safe, and sulfate and paraben free. So it's good stuff too. I just wanted to make you aware of this option too. Check them out! Check out the review I did of their conditioner.

Bonus: Use the code skipthebag to get 15% off!

Salon Solids

Salon Solids is another option for zero waste hair care. They use paper tubes for their packaging. If you return eleven tubes you get a 12th for free! They ship to you a container of biodegradable granules. You mix it with hot water and then use like regular shampoo. They have several different scents including citrus and forest. You can buy them outright or they have a subscription service so you never have to worry about running out again. Read my Salon Solids Review.

subscriptions

What do you use for your hair?
*This is an affiliate link, see disclosure.
Pin for later:

Aug 1, 2016

The KISS Principle


Have you heard of the acronym KISS? Well, if Wikipedia is to be believed it was started by the Navy and stands for, "keep it simple, stupid." We aren't for name calling around here so I like to think it stands for "keep it super simple." It means that you shouldn't try to over think issues or over complicate them. Just make it as simple as possible.

There have been studies that show that humans have a set amount of willpower. If you are busy fighting against yourself all day you will likely mess up and lash out later.  Therefore you should make it easy on yourself to help you meet your goals. Save that willpower for when you need it and don't force yourself to use it unnecessarily.

An example from trying to lose weight would be: don't have a bowl of candy on your desk. Seeing the candy and regularly saying  "no" tests your willpower. So when you go out to dinner you may be more likely to splurge and get a less healthy dinner and maybe even dessert!

Pin for later:
Keep It Super Simple. The KISS Principle. Don't make going zero waste harder than it needs to be. Use the KISS principle to make zero waste and plastic free living easy!

Similar concepts happen when trying to establish new environmentally friendly habits. We are most likely going to take the simplest path, the one of least resistance. So planning and preparing for the situations you will likely face, means that the new environmentally friendly path will be the one that is simplest and you can save that willpower for more difficult choices.

So here are some ideas of things to plan ahead and prepare so you will be able to easily make a more environmentally friendly choice:
  • Carry a reusable bag with you in your purse or keep them in the car
  • Set your coffee maker on a timer for when you wake up so you don't buy take away coffee
  • Cook extra food to take as leftovers
  • Get in the habit of ordering drinks without a straw
  • Put a recycling bin next to the trash can in the house
  • Put your reusable water bottle by your keys so you remember to take it with you
  • Keep a reusable water bottle or coffee mug at work
  • Keep a set of silverware at work so you don't have to use plastic silverware
  • Go through your pantry and refrigerator to make a meal plan 
  • Take a look at your bathroom habits to see what less waste alternatives you can purchase now and have on hand when you run out (bamboo toothbrushes, shampoo bar, safety razor, etc)
  • Make homemade cleaning products when your current ones run out
  • Know your city's recycling policy and keep it in mind while shopping
  • Save glass jars from food you bought to use as storage
Finally, the most important thing is to just take it one step at a time. Don't over complicate it by worrying about every possible scenario; just take it day-by-day, choice-by-choice. There may be some stumbles, but you are doing better than you would have been.

What things do you to that make it easier to avoid plastic or waste?

Don't forget to check out these 8 things they don't tell you about going zero waste! The first one is that plastic guilt is real!